
Add a sender (From name and address)
In Email setup, open Add a sender address, enter a From name and a From email on your verified domain, optionally a Reply-to, and click Add sender.
On this page
A sender is the name and address people see on your emails, like “Sam at Northwind hello@northwind.app”. Open Email setup, go to Add a sender address, fill in From name and From email (on a domain you verified), add a Reply-to if you want replies to go elsewhere, and click Add sender. Your first sender becomes the default.
Add your first sender
- Click Email setup in the sidebar and open the step Add a sender address. Verify your domain first if you have not: Verify your sending domain.
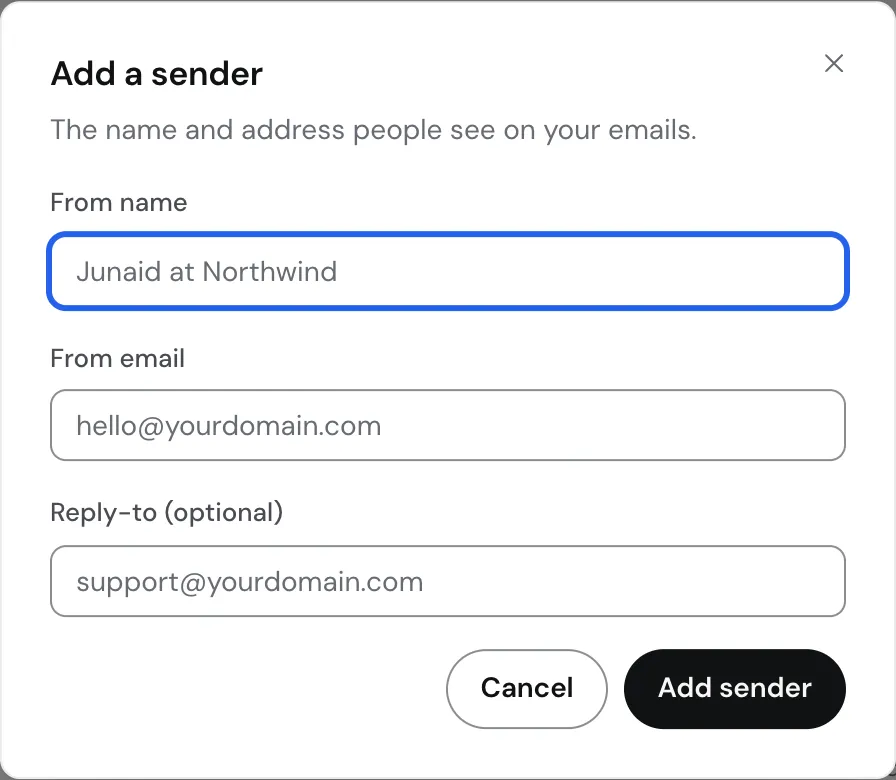
- From name: the name people see in their inbox. A person plus your product works well, for example “Sam at Northwind”.
- From email: Meisa suggests
hello@your verified domain. Change it to any address on that domain, such as[email protected]or[email protected]. The mailbox does not need to exist in SES, but use one you can receive mail at if people reply. - Reply-to (optional): where replies go, for example
[email protected]. Leave it empty to receive replies at the From email. - If you have more than one provider, choose it in Sends through.
- Check the preview line Recipients see: and click Add sender.
 Once your provider, domain and sender are all set, Meisa shows “Email is ready to send” with buttons to Send a test or Send your first email.
Add more senders
- On Email setup, click Add sender at the top of the page (or in the Sender addresses section).
- Fill in the Add a sender dialog the same way and click Add sender.
Use separate senders for different kinds of email, for example hello@ for onboarding and news@ for your newsletter. Sequences and transactional emails let you pick which sender to use.
Manage senders
In the Sender addresses section of Email setup, each sender has these actions:
- Set as default: the sender used whenever an email does not name one.
- Edit: change the From name, From email or Reply-to. When editing you can also set a Label (optional), for your team only. Recipients never see it.
- Delete: sequences and transactional emails that send from it will fail until you pick another sender.
Sender status
The Status column shows Verified (or Verified, default) when the sender can send. If it shows Not verified, the reason is next to it:
- Domain not added: the From email is on a domain you have not added. Add it under Domains.
- Domain not verified: the domain was added but its DNS records are not live yet.
- Not checked yet: the domain is verified but this sender has not been re-checked. Click Re-check sender status.
Meisa blocks sending from an unverified sender, so a typo in the domain stops emails instead of hurting your reputation.
With Amazon SES, a sender on a subdomain (for example [email protected]) works once the main domain northwind.app is verified.
Tips for a good From line
- Keep the From name consistent. Changing it often hurts recognition and open rates.
- Avoid
noreply@addresses. Replies are a good signal to inbox providers, and people use them to reach you. - Send newsletters and product emails from your own domain, never from a Gmail or Outlook address.
Troubleshooting
- ”… is already a sender. Open it from the list to change it.”: that address exists. Edit it instead.
- Sending fails with “Sender … is not verified”: check the sender’s status and the domain’s records in Domains, then click Re-check sender status.
- Test email does not arrive: if your SES account is in the sandbox, the recipient must be a verified address in SES. See Move AWS SES out of the sandbox.
Related articles
Did this answer your question?
Thanks for letting us know.Thanks, we will improve this article. Want a hand right now?
Still need help?
Chat with us and get an answer in a few minutes.