
Connect Amazon SES to Meisa
Go to Email setup, click Connect a provider, choose Amazon SES, paste your access key ID and secret, pick your region and click Add provider.
On this page
To connect Amazon SES, open Email setup, click Connect a provider, choose Amazon SES, paste your IAM access key ID and secret access key, pick the region your SES account uses, and click Add provider. Meisa checks the keys straight away and tells you if AWS rejects them.
Before you start
You need:
- An AWS account with SES available in your chosen region.
- An access key for an IAM user with Meisa’s permissions. If you do not have one yet, follow Create an AWS IAM user and access keys for Meisa.
- The region where you will verify your domain, for example US East (N. Virginia),
us-east-1. Not sure? Read Which AWS SES region should I choose?
Connect SES
- In Meisa, click Email setup in the sidebar. A new product shows three steps: Connect your email provider, Verify your domain and Add a sender address.
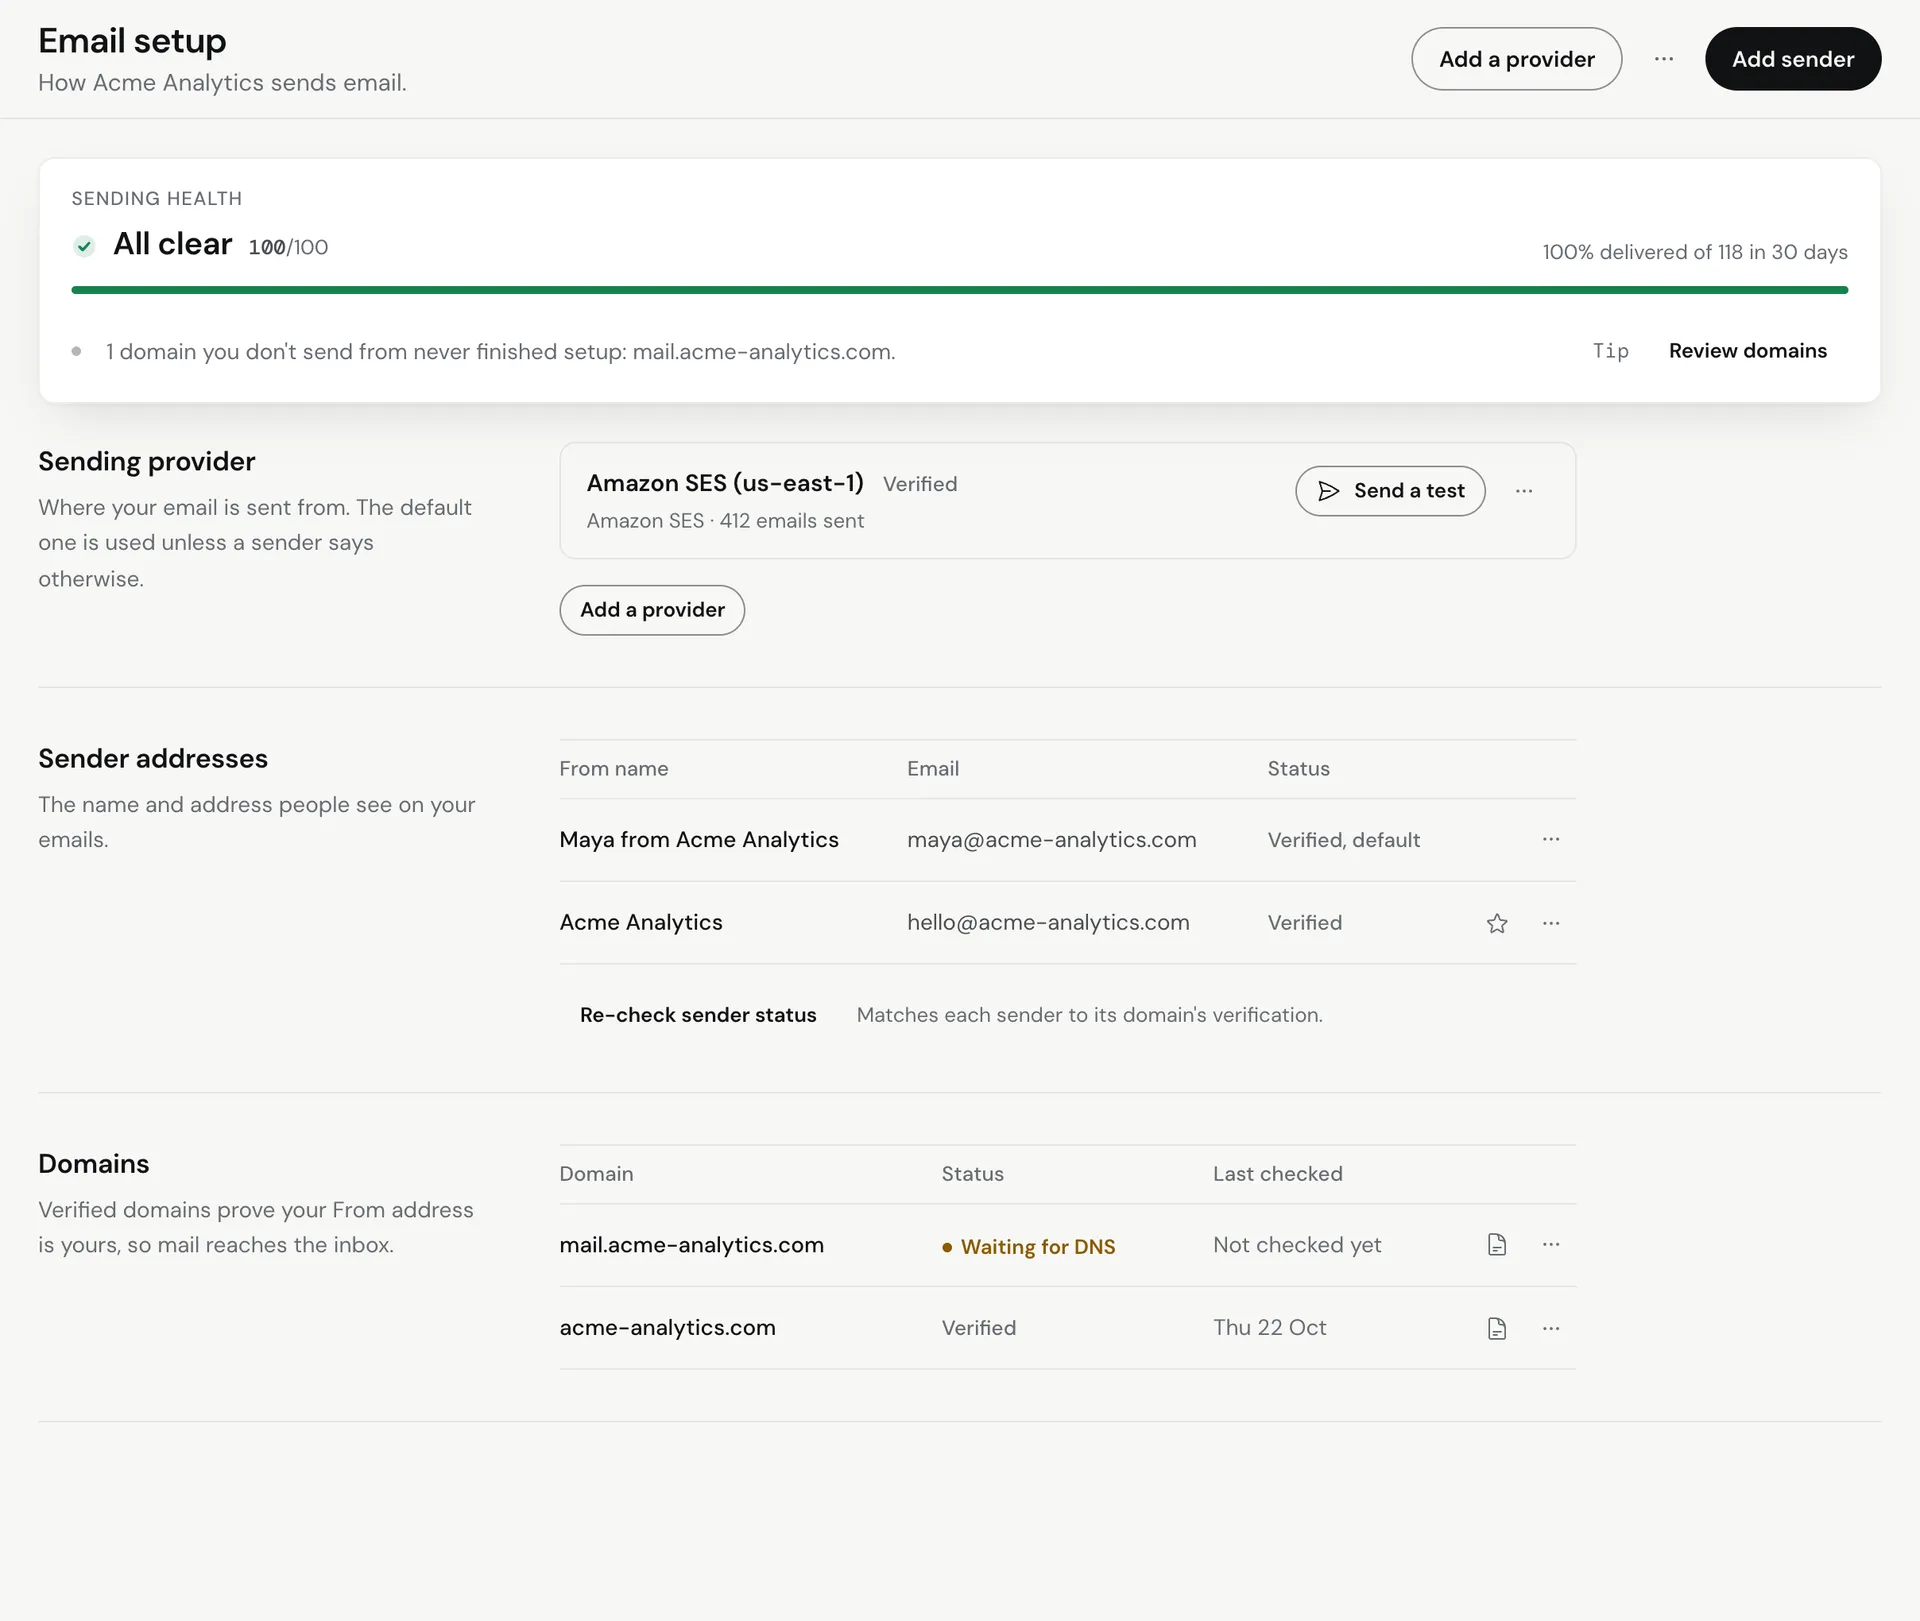
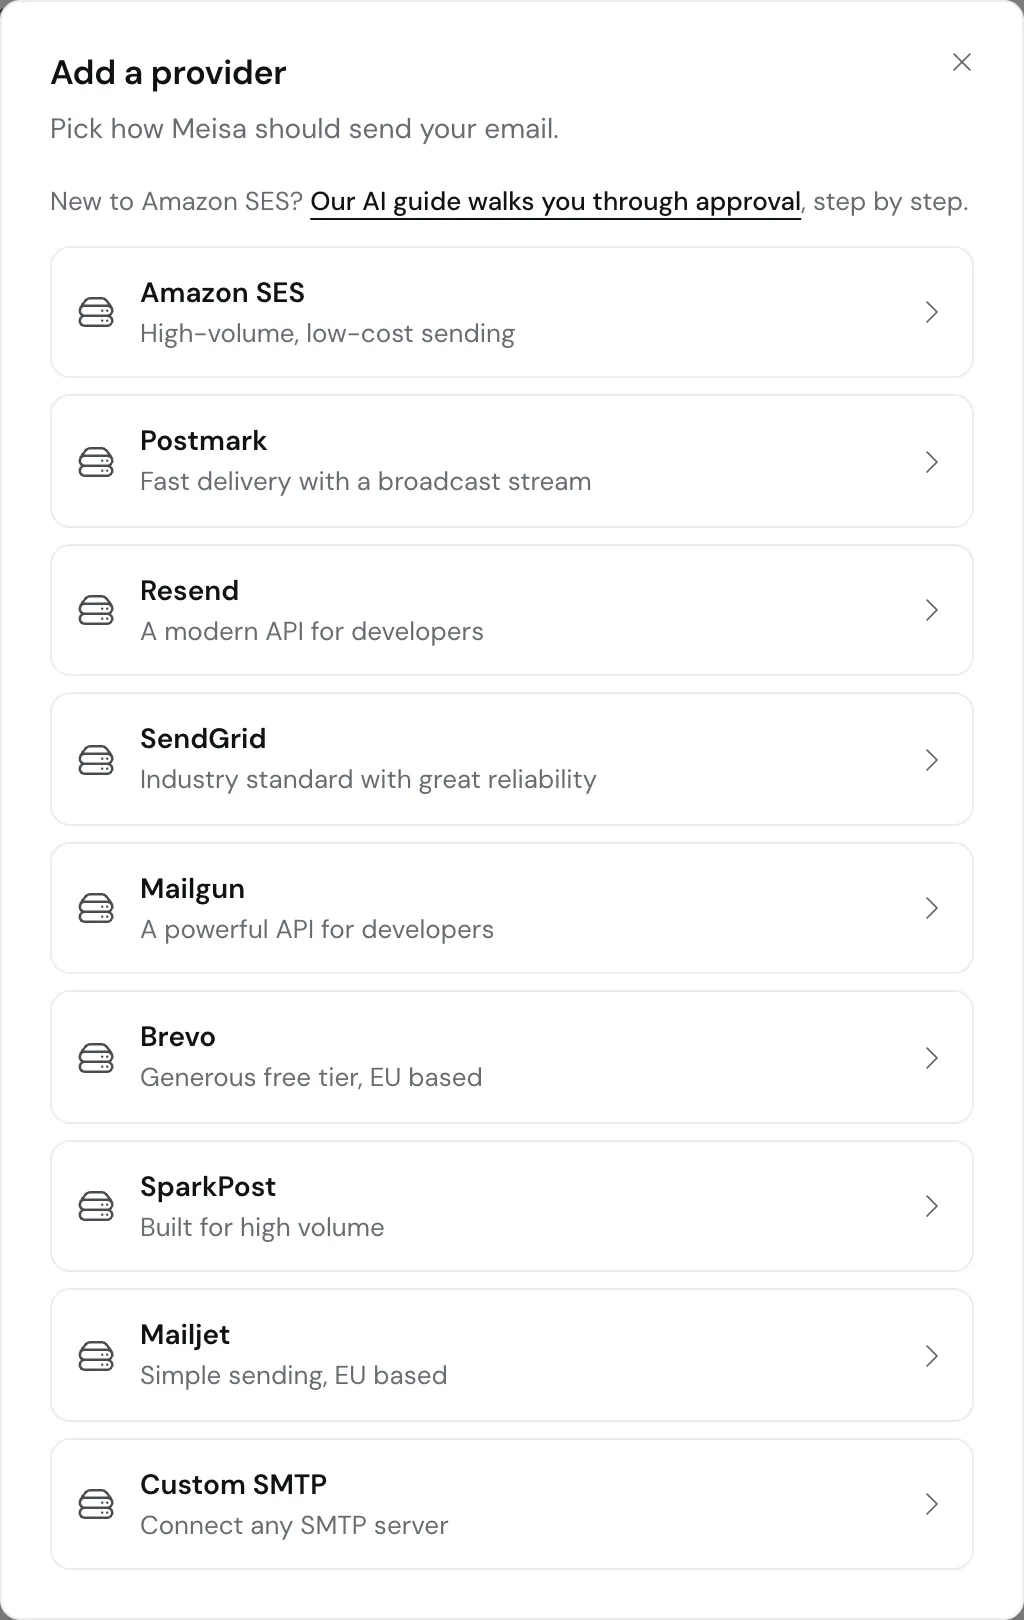
- In the first step, click Connect a provider. The Add a provider dialog opens.
- Click Amazon SES at the top of the list.
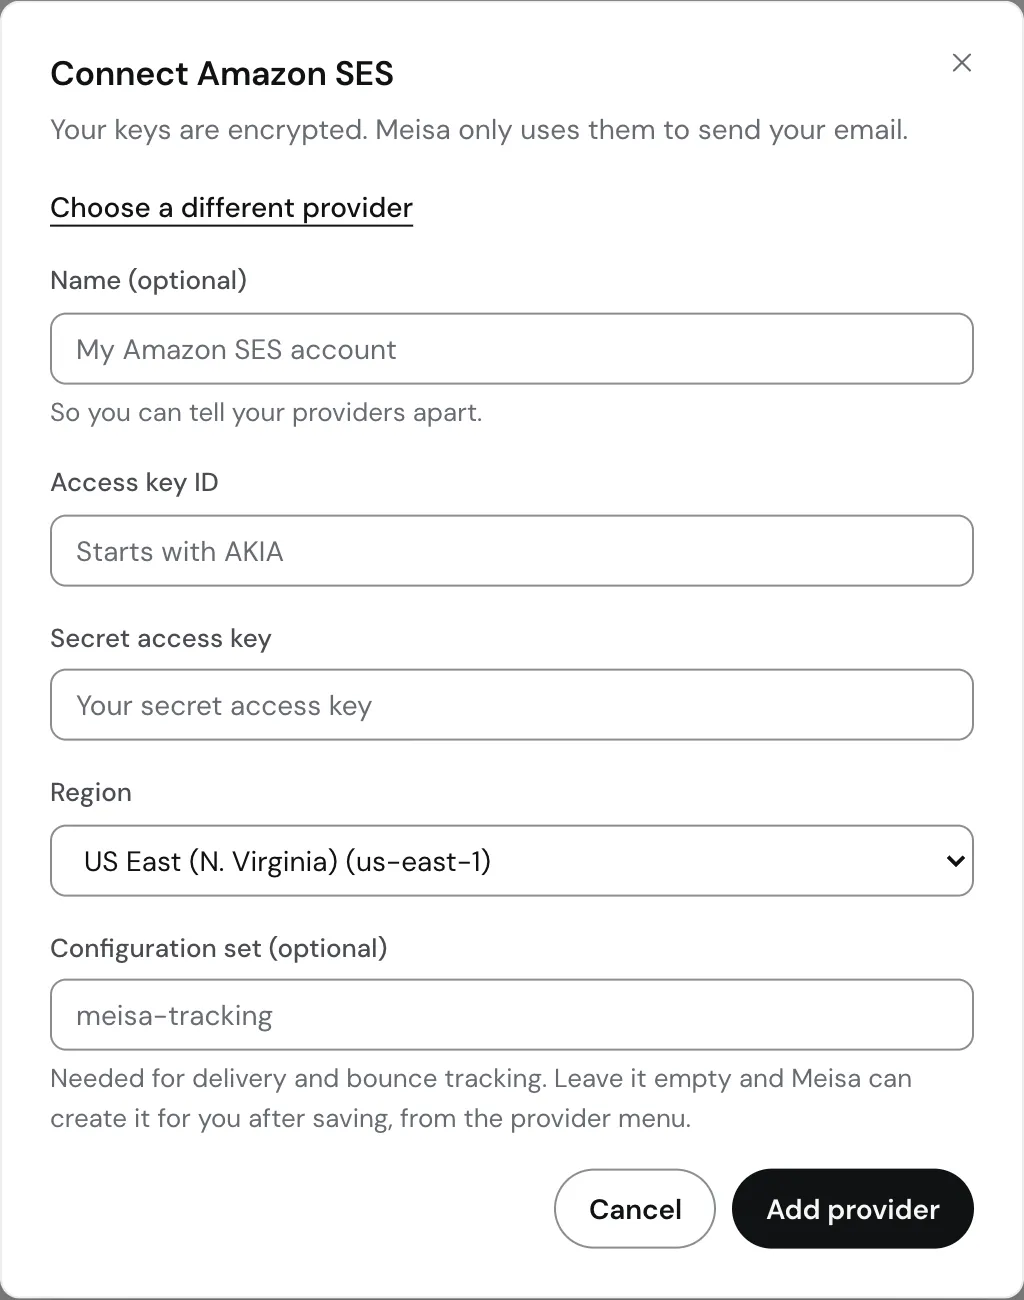
- Name (optional): give it a name you will recognise, such as “SES production”. If you leave it empty, Meisa uses “My Amazon SES account”.
- Access key ID: paste the access key from IAM. It starts with
AKIA. - Secret access key: paste the secret access key.
- Region: choose the same region you use in the SES console, for example US East (N. Virginia) (us-east-1). The default is us-east-1, so change it if your SES account is elsewhere.
- Configuration set (optional): leave this empty. Meisa creates one for you later when you set up delivery tracking.
- Click Add provider.
 Meisa saves the provider and immediately asks AWS for your sending quota to confirm the keys work. If they do, you see a “Saved” message with the provider name and the step shows as done. Next, verify your sending domain.
After you finish setup: turn on delivery tracking
Once your provider, domain and sender are all set, Email setup switches to a manage view. Do this once:
- In the Sending provider section, click the More actions menu (three dots) on your SES provider.
- Click Set up delivery tracking, then Set up tracking.
Meisa creates a configuration set and an SNS topic in your AWS account so bounces and spam complaints come back to Meisa and those addresses are suppressed automatically. Details: Set up open and click tracking.
Manage the provider later
From the Sending provider section of Email setup you can:
- Send a test: sends a real email through SES from one of your senders. Needs at least one sender.
- Verify or Re-verify: checks the keys again.
- Edit: change the name, keys or region. Leave the secret blank to keep the saved one.
- Set as default: when you have more than one provider.
- Disable or Enable: stop or resume sending through this provider.
- Delete: removes the provider and the senders and domains on it.
Troubleshooting
- “Amazon SES did not accept these details. Check them and save again.” The key or secret is wrong, has a trailing space, or the IAM user is missing
ses:GetSendQuota. Fix the values and click Add provider again. Meisa updates the same provider instead of creating a duplicate. - The provider shows “Keys not working”: the keys were deactivated or deleted in IAM, or the policy was removed. Click Fix keys (or Edit) and paste a working key.
- Keys work but your domain never shows records: check the region. A domain verified in one region is invisible from another.
- Test emails do not arrive: while your SES account is in the sandbox, you can only send to addresses you verified in SES. See Move AWS SES out of the sandbox.
Related articles
Did this answer your question?
Thanks for letting us know.Thanks, we will improve this article. Want a hand right now?
Still need help?
Chat with us and get an answer in a few minutes.