
Verify your sending domain (DKIM, SPF and DMARC)
Add your domain in Email setup, copy the 3 DKIM CNAMEs plus the SPF and DMARC TXT records to your DNS host, then click Check my records.
On this page
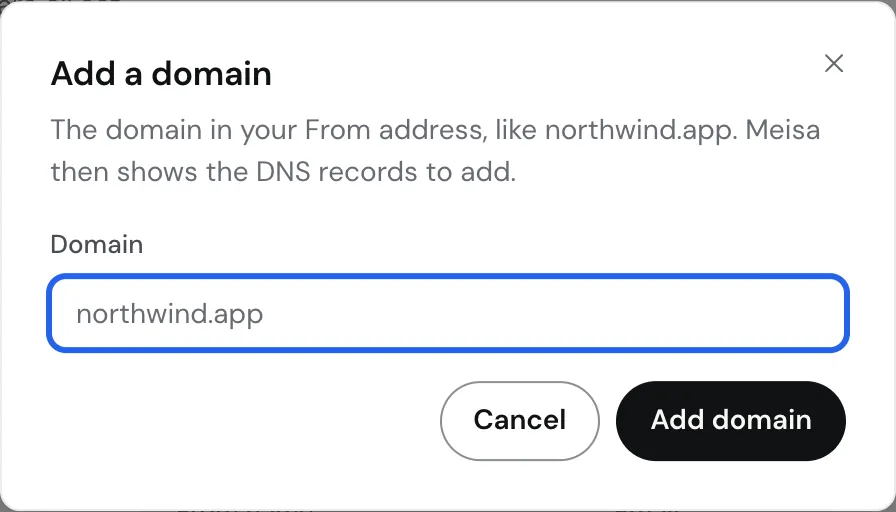
To verify your domain, open Email setup, enter the domain from your From address under Verify your domain and click Add domain. Meisa adds it to your Amazon SES account and shows 5 DNS records: 3 DKIM CNAMEs, 1 SPF TXT and 1 DMARC TXT. Add them at your DNS host and click Check my records. Most domains verify within an hour.
Add the domain in Meisa
- Click Email setup in the sidebar. Connect Amazon SES first if you have not: Connect Amazon SES to Meisa.
- Open the step Verify your domain.
- In Your domain, type the domain your emails will come from, for example
northwind.app. Do not includehttps://,www.or an email address. Meisa cleans these up for you. - If you have more than one provider, choose the right one in Provider.
- Click Add domain.
Already set up? On the manage view, click Add a domain at the top of Email setup instead. The Add a domain dialog works the same way.
The records Meisa shows
Meisa lists every record in one table with Type, Name, Value and Status. For Amazon SES you get 5 records:
| Purpose | Type | Name | Value |
|---|---|---|---|
| DKIM | CNAME | <token1>._domainkey.yourdomain.com |
<token1>.dkim.amazonses.com |
| DKIM | CNAME | <token2>._domainkey.yourdomain.com |
<token2>.dkim.amazonses.com |
| DKIM | CNAME | <token3>._domainkey.yourdomain.com |
<token3>.dkim.amazonses.com |
| SPF | TXT | @ |
v=spf1 include:amazonses.com ~all |
| DMARC | TXT | _dmarc |
v=DMARC1; p=none; |
The tokens are long random strings that AWS generates for your domain. Always copy them from Meisa, never from this example.
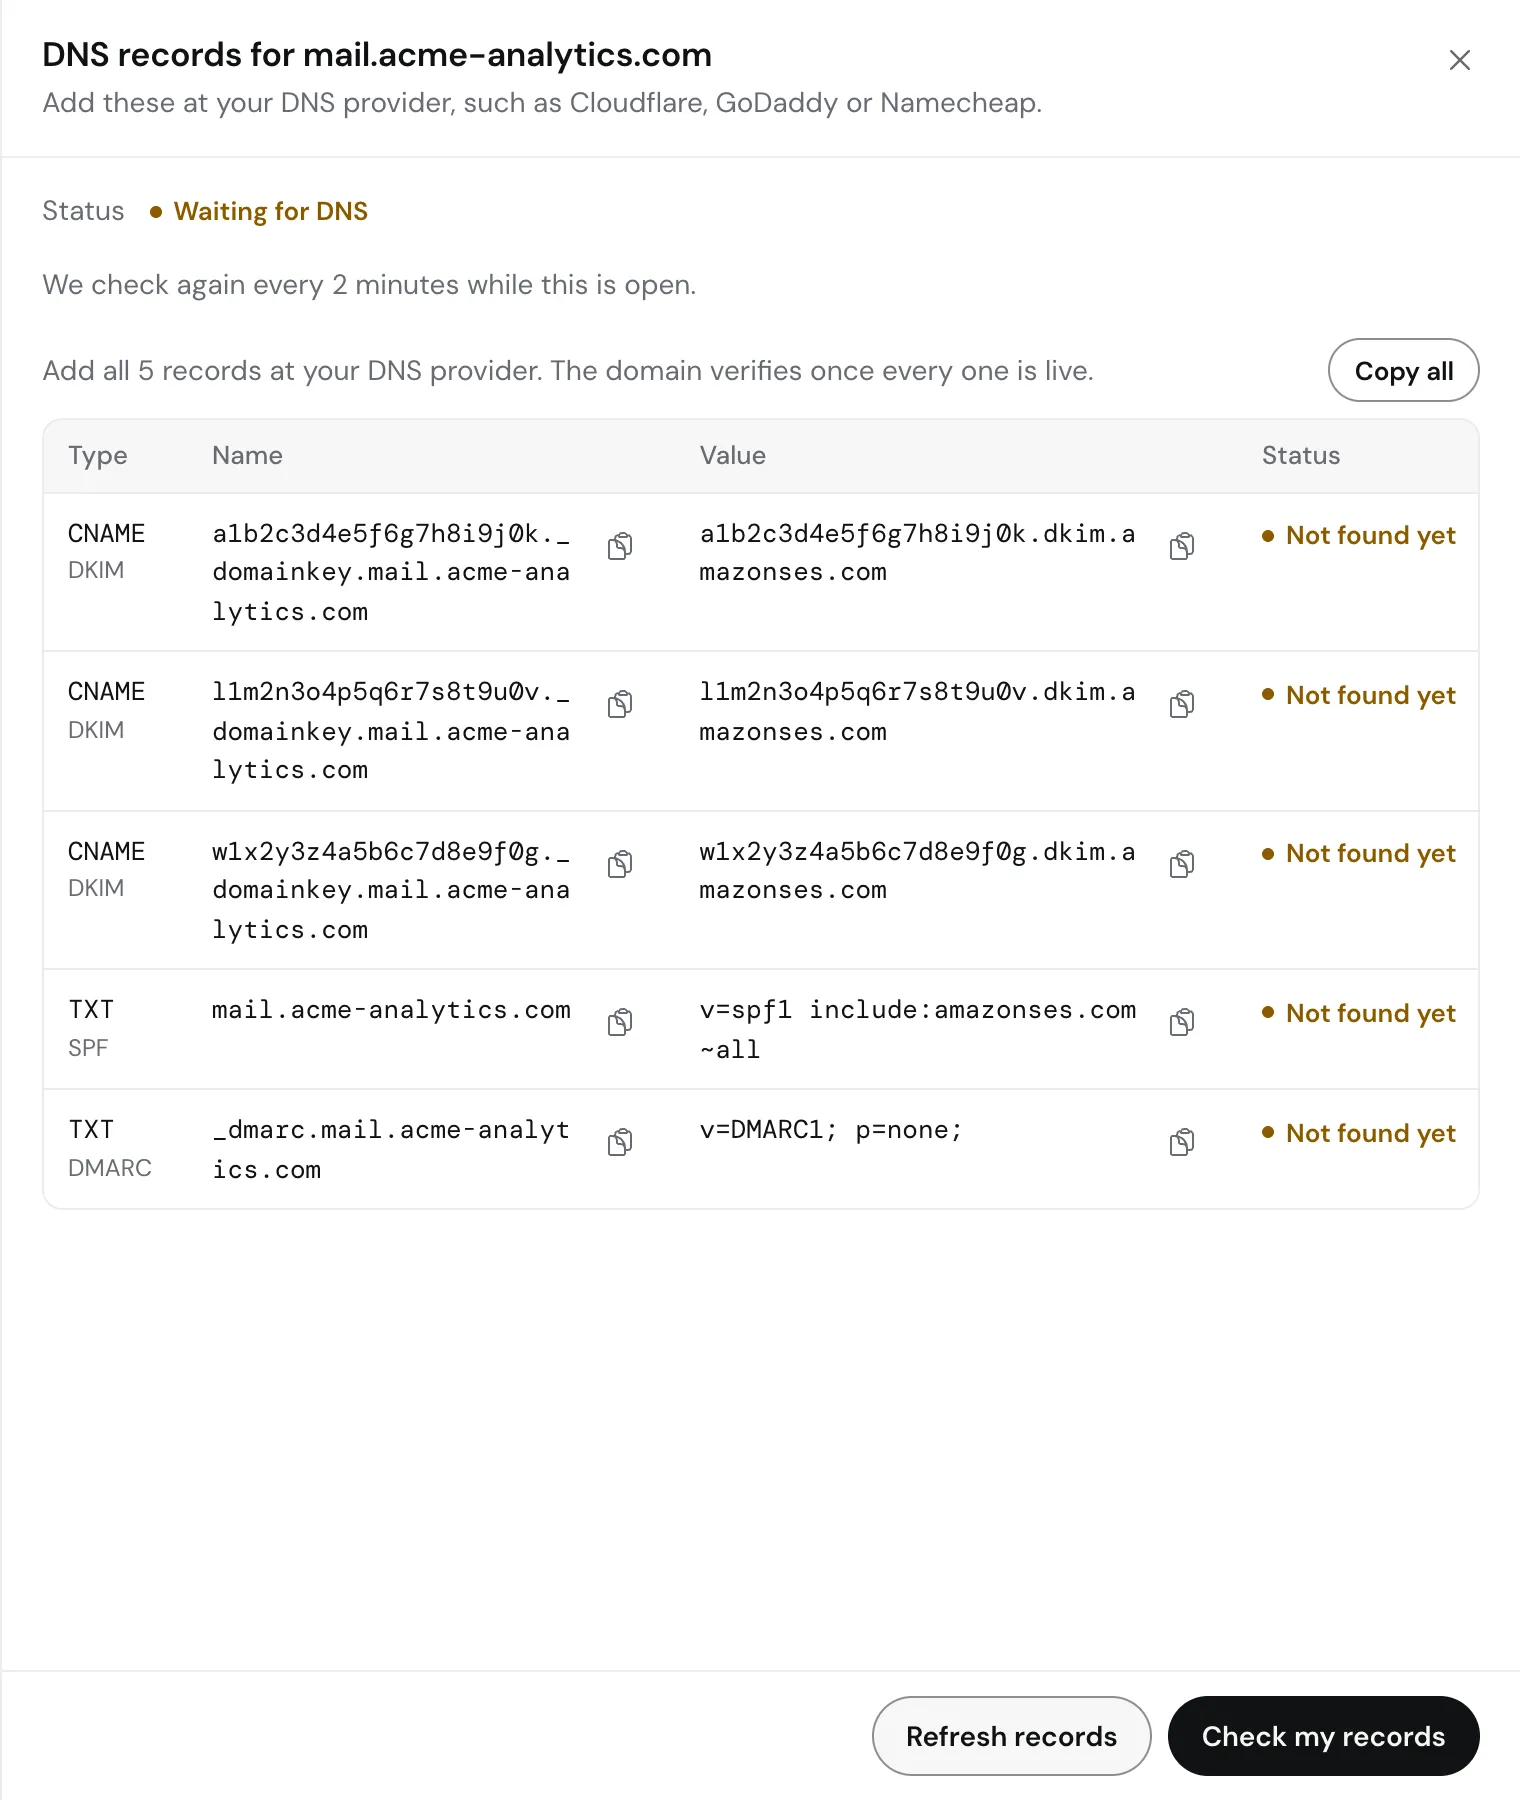
- Click the copy icon next to any Name or Value to copy it.
- Click Copy all to copy every record as tab-separated lines, handy for a DNS bulk editor or a message to whoever manages your DNS.
What each record does
- DKIM (3 CNAMEs) lets AWS sign every email with your domain. This is what verifies the domain in SES, and it is the record inbox providers trust most. All 3 are required.
- SPF (TXT at the root, shown as
@) says Amazon SES may send for your domain. If your domain already has an SPF record (it starts withv=spf1), do not add a second one. Edit the existing record and addinclude:amazonses.combefore the final~allor-all, for examplev=spf1 include:_spf.google.com include:amazonses.com ~all. - DMARC (TXT at
_dmarc) tells inbox providers what to do with mail that fails checks. Gmail and Yahoo expect it from bulk senders.p=noneonly monitors and never blocks mail, so it is the safe start. If you already have a DMARC record, keep yours. Meisa accepts any validv=DMARC1record.
Add the records and check
- Open your DNS host in a new tab and add the 5 records. Step-by-step help for Cloudflare, GoDaddy, Namecheap and Route 53: Add Meisa’s DNS records at your DNS host.
- Back in Meisa, click Check my records.
- If everything is live you see “yourdomain.com is verified.” If not, you see “Not visible yet. DNS changes can take up to an hour.” Leave the page open: Meisa checks again every 2 minutes.
Each row’s Status shows Found, Not found yet or Failed. For SPF and DMARC, Meisa looks up your live DNS and shows what it found if it differs, for example “Your DNS has: …”. A DMARC row marked “monitoring only” means your policy is p=none, which is fine.
The domain counts as verified once AWS confirms the DKIM records. Add SPF and DMARC anyway: they matter for inbox placement.
Optional: a custom MAIL FROM domain in SES
By default, SES uses an amazonses.com address as the hidden bounce address. A custom MAIL FROM domain (for example mail.yourdomain.com) makes SPF align with your domain too, which helps DMARC. Meisa does not need it, but it is good practice:
- In the SES console, go to Configuration, then Identities, and click your domain.
- Open the Custom MAIL FROM domain tab and click Edit.
- Tick Use a custom MAIL FROM domain, enter
mailas the subdomain, and for Behavior on MX failure choose Use default MAIL FROM domain. Click Save changes. - Add the MX and TXT records AWS shows (an MX pointing to
feedback-smtp.<region>.amazonses.comand a TXT withv=spf1 include:amazonses.com ~all, both onmail.yourdomain.com).
After verifying
Add the address people will see: Add a sender (From name and address). Any sender on a verified domain, or on a subdomain of it, can send through SES.
Troubleshooting
- Still pending after an hour: see My domain is still pending verification. The usual causes are a doubled name (
...yourdomain.com.yourdomain.com), a Cloudflare proxied CNAME, or the domain verified in a different AWS region. - “Your provider didn’t return any DNS records”: open View records and click Refresh records. If it still fails, check your IAM user has
ses:VerifyDomainDkim. - SPF shows Failed: your SPF record exists but does not include
amazonses.com. Edit it as shown above. - Records lost: on the manage view, find the domain in Domains and click View records any time.
Related articles
Did this answer your question?
Thanks for letting us know.Thanks, we will improve this article. Want a hand right now?
Still need help?
Chat with us and get an answer in a few minutes.