
Create and manage API keys
Go to Settings, open API keys and webhooks, click Create API key, pick the permissions your app needs, and copy the key before you close the dialog.
On this page
To create an API key, go to Settings, open API keys and webhooks, click Create API key, choose what the key is allowed to do, and copy it. Meisa shows the full key only once, so store it in your app’s secrets right away.
Each key belongs to one product (workspace). If you run several apps in Meisa, create a key in each product.
Create a key
- In the sidebar, click Settings.
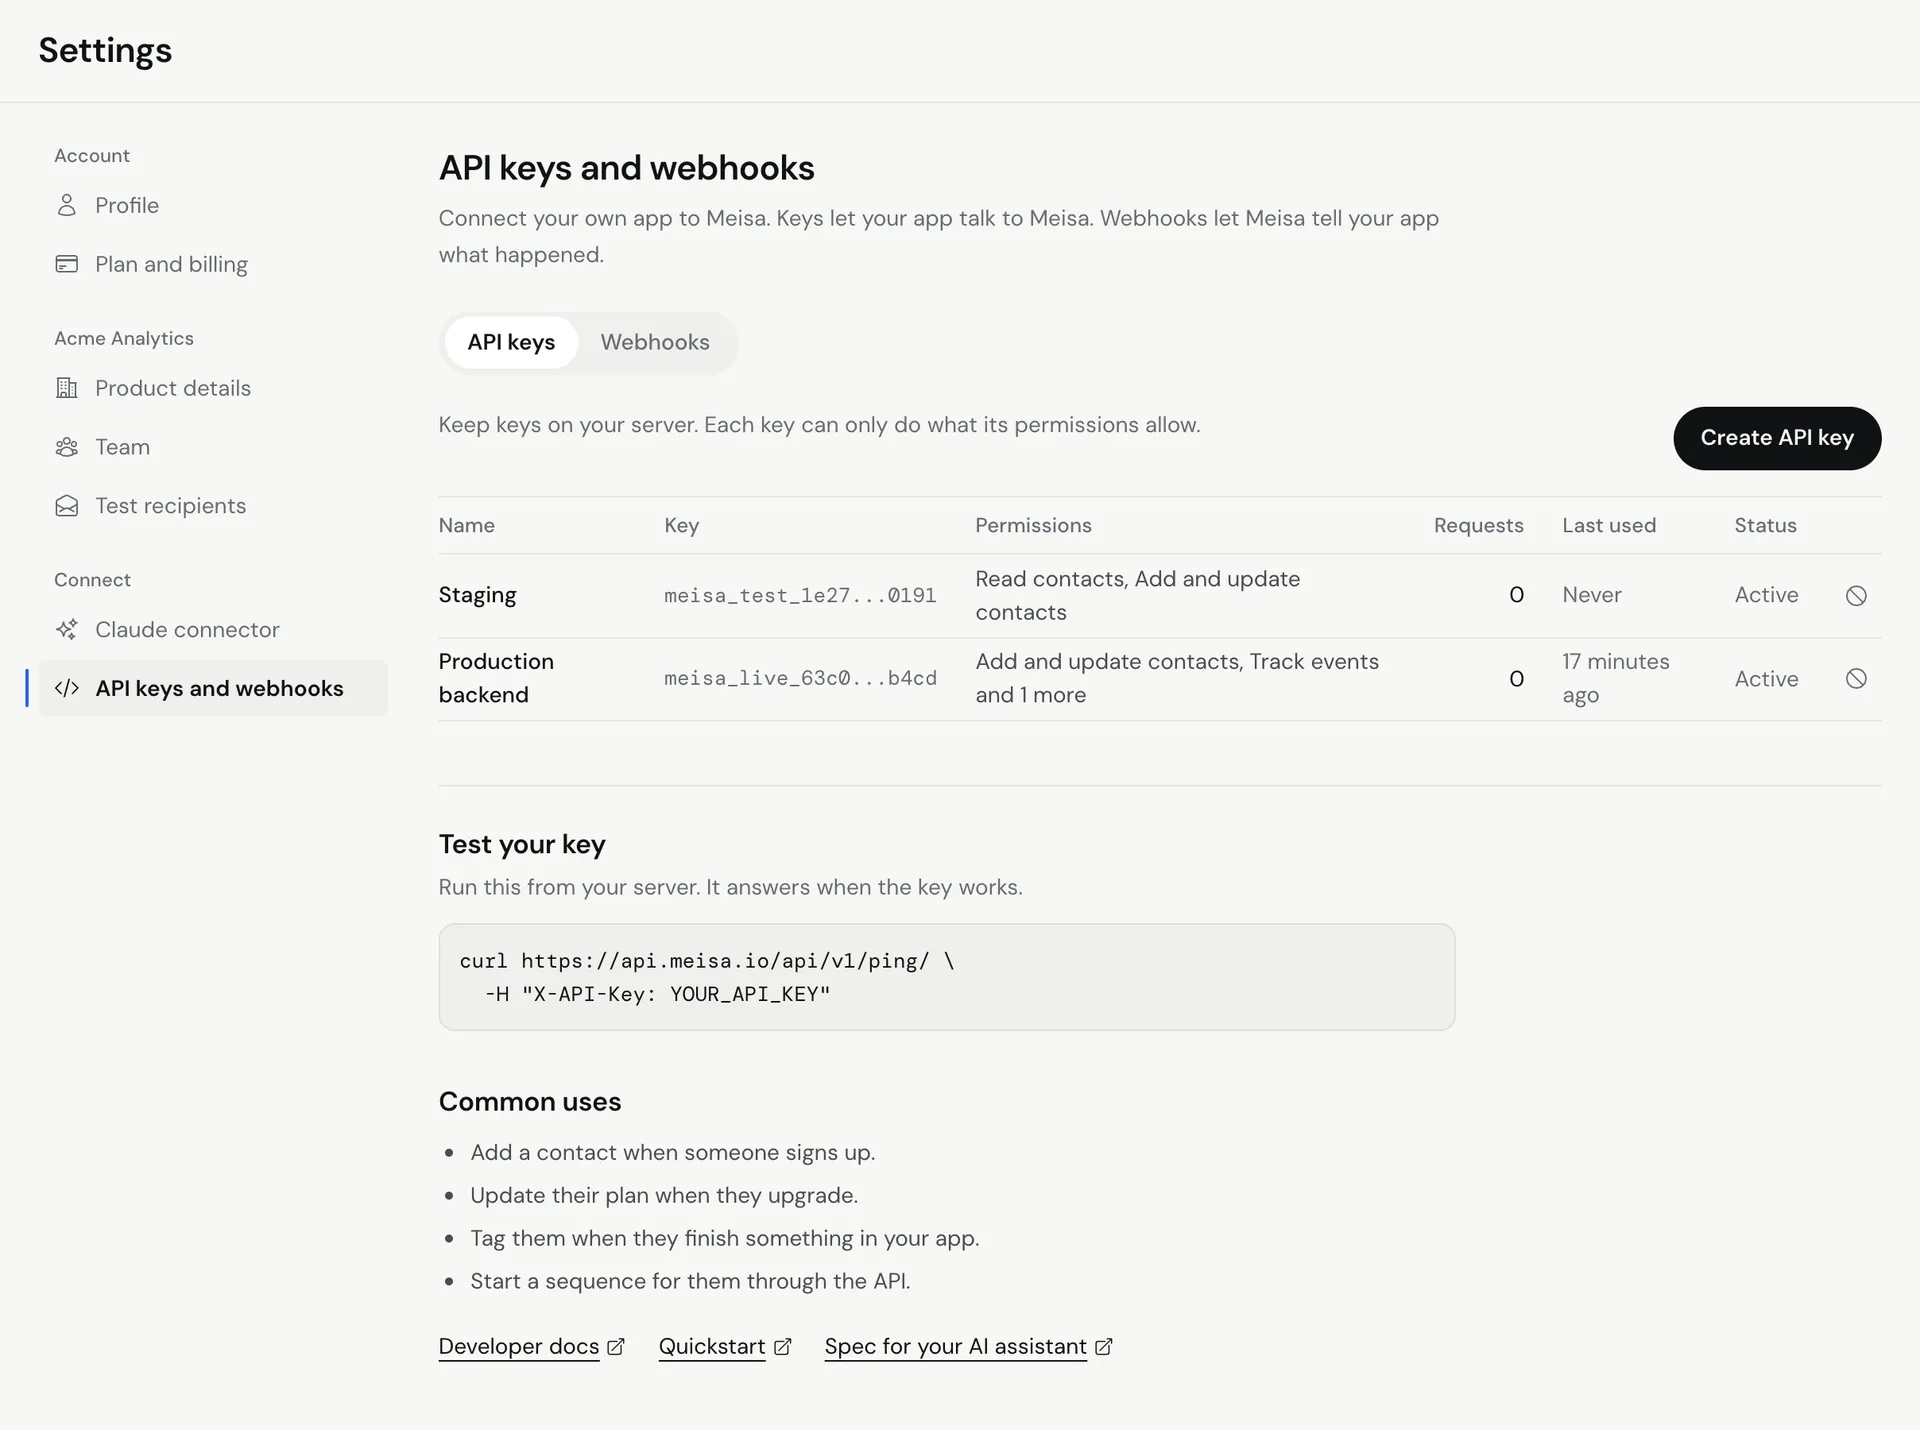
- Under Connect, click API keys and webhooks. The API keys tab opens.
- Click Create API key.
- In Name, enter something that tells you where the key lives, for example “Production backend”.
- Under Permissions, pick a preset or tick exactly what the key needs:
- Read only, Contacts and events or Everything set several at once.
- Or tick them one by one (see the table below).
- Click Create key.
- In Your new API key, click Copy key and paste it into your app’s environment variables or secrets manager.
- Tick I’ve saved this key somewhere safe and close the dialog.
What each permission allows
| Permission | Scope | Lets your app |
|---|---|---|
| Read contacts | contacts:read |
Look up contacts and fetch the list of unsubscribed addresses. |
| Add and update contacts | contacts:write |
Create and update contacts, and add or remove tags. |
| Add and remove tags | tags:write |
Tag contacts. |
| List sequences | sequences:read |
List your sequences and see a contact’s enrollments. |
| Add people to sequences | sequences:enroll |
Enroll people in sequences and email courses. |
| Track events | events:track |
Send events like trial_started that can start automations. |
| Send transactional emails | emails:trigger |
Send transactional emails and direct emails. |
Give each key only what it needs. A call that needs a permission the key doesn’t have gets a 403 error.
Test the key
The Test your key section on the same page has a ready-made command. It looks like this:
curl "https://api.meisa.io/api/v1/ping/" \
  -H "X-API-Key: meisa_live_your_key"
A working key returns "status": "ok" along with the key’s name, its permissions, its rate limits and the product it belongs to.
See how a key is used
The keys table shows each key’s Requests, Last used time and Status (Active, Expired or Revoked). A key that hasn’t been used in months is a good candidate to revoke.
Revoke a key
- Find the key in the table.
- Click Revoke key and confirm.
Apps using the key stop working right away, and a revoked key can’t be turned back on. To rotate a key without downtime, create the new key first, deploy it, check Last used on the old key stops moving, then revoke the old one.
Keep keys safe
- Use keys only on your server. Never put them in frontend code, a mobile app or a public repository.
- Use a separate key for each app or environment so you can revoke one without breaking the others.
- If a key leaks, revoke it at once and create a new one.
Troubleshooting
- 401 error: the
X-API-Keyheader is missing, the key was copied wrong, or the key was revoked. - 403 error: the key doesn’t have the permission for that call. Create a new key with the right permissions.
- 429 error: you hit the key’s rate limit. Wait and retry with backoff. The ping response shows the key’s limits.
- I lost the key: Meisa can’t show it again. Create a new key and revoke the old one.
Related articles
Did this answer your question?
Thanks for letting us know.Thanks, we will improve this article. Want a hand right now?
Still need help?
Chat with us and get an answer in a few minutes.